
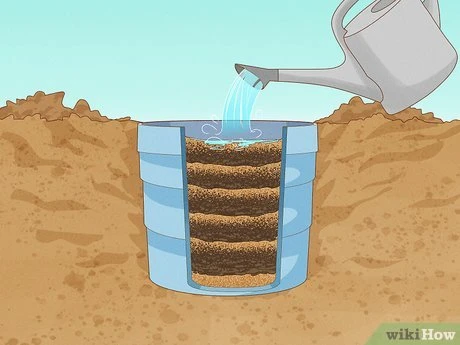
PawVerde.com – Creating a dedicated pet waste compost bin allows homeowners to safely recycle dog and cat waste into valuable compost for non-edible plants, reducing environmental pollution and landfill burden. Properly composted pet waste eliminates pathogens, minimizes odors, and produces nutrient-rich soil amendment when managed with appropriate materials, temperature control, and maintenance practices. This tutorial provides detailed, step-by-step instructions to build, operate, and maintain a pet waste compost bin following safety protocols and scientific composting principles.
Selecting an appropriate location and container is critical to preventing runoff contamination and ensuring effective composting. Mixing pet waste with high-carbon materials at correct ratios, monitoring moisture, and maintaining high temperatures achieve pathogen elimination. The process includes compost curing to stabilize material before safe use on ornamental gardens and lawns. This guide also covers troubleshooting common issues and best practices for safe pet waste composting at home.
Step 1: Choosing and Preparing the Compost Bin Location
Effective pet waste composting begins with selecting a site that supports aerobic decomposition while protecting groundwater and edible plants from contamination. Choose a well-drained, level location that is isolated from vegetable gardens, orchards, and water sources such as wells, streams, or ponds. A minimum distance of 10 feet from edible plants and at least 50 feet from water bodies reduces contamination risk.
Avoid placing the bin in high-traffic areas, near children’s play zones, or locations prone to flooding. Good drainage prevents leachate accumulation, which can cause odor and pathogen spread. Prepare the site with a gravel or coarse sand base to enhance drainage under the bin. This foundation also stabilizes the compost container and facilitates airflow from below.
If local regulations exist regarding pet waste disposal or composting, ensure your site selection complies with those rules. For example, some municipalities require pet waste compost bins to be sealed or located within fenced areas.
Step 2: Selecting or Constructing the Compost Bin
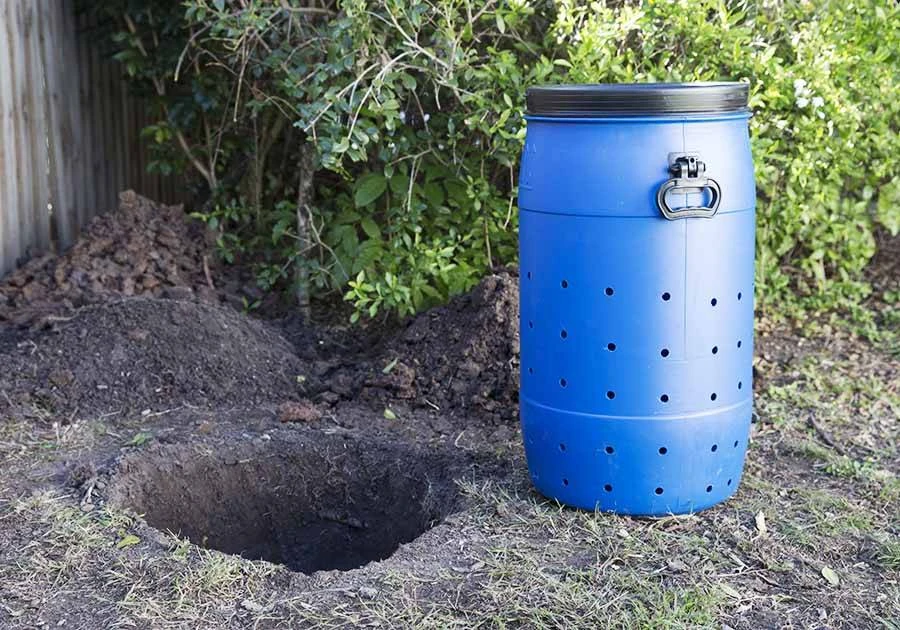
Choose a compost bin that provides adequate containment, drainage, aeration, and access for turning and monitoring. Common home-use options include:
Enhance airflow by installing perforated PVC pipes vertically through the bin or drilling multiple holes spaced evenly. Good aerobic conditions accelerate decomposition and reduce odors. A gravel layer (2-3 inches) at the bottom of the bin supports drainage and prevents waterlogging.
Ensure the bin has a tight-fitting lid to keep out scavengers and rainwater, which can dilute the compost and cause anaerobic conditions. Position the bin on a stable base to allow easy access for turning and monitoring temperature.
Step 3: Preparing Compost Materials and Mixing Ratios
Pet waste alone is high in nitrogen and moisture but lacks sufficient carbon, which is essential for balanced composting. Add carbon-rich materials to absorb excess moisture and provide energy for microbial activity.
Use only biodegradable kitty litter made from pine, paper, or other compostable materials. Avoid clay-based or silica litters, as they do not break down and can harm compost quality.
Recommended carbon sources include:
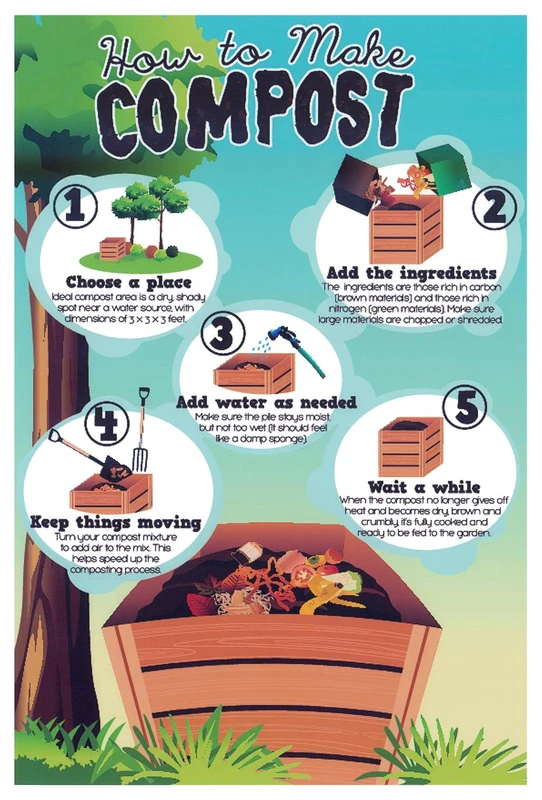
The ideal carbon-to-nitrogen ratio (C:N) in the compost pile should be approximately 20-30:1. Since pet waste is nitrogen-rich, mix it with carbon materials in roughly a 1:2 ratio by volume (1 part pet waste to 2 parts carbon source). This balance supports microbial growth and prevents ammonia odors.
Maintain moisture at the consistency of a wrung-out sponge—damp but not soggy. Excess moisture leads to anaerobic decomposition and odor generation, while too little moisture stalls microbial activity. Test moisture by squeezing a handful of material: a few drops of water may appear, but it should not drip freely.
Step 4: Managing the Composting Process and Maintenance
Proper composting requires maintaining aerobic conditions, temperature control, and regular turning.
Maintaining these conditions can take several weeks. Use a compost thermometer with a probe length of 12 inches or more to measure temperature at the core, not just surface heat.
Step 5: Compost Curing and Safe Usage
After the active composting phase, allow the material to cure for several months to 1-2 years. During curing, microbial activity slows, and the compost stabilizes, with organic matter fully decomposed and pH levels normalizing.
Curing time varies depending on climate, bin size, and maintenance. Finished compost should be dark, crumbly, and earthy-smelling with no recognizable pet waste particles.
Use finished compost exclusively on:
Avoid applying pet waste compost to vegetable gardens or edible plants due to residual pathogen risks. Do not use near water sources to prevent contamination.
Troubleshooting and Best Practices for Pet Waste Composting
Alternative Methods and Enhancements
Practical Example: Building a DIY Pet Waste Compost Bin
| Compost Component | Recommended Material | Role in Compost |
|---|---|---|
| Pet Waste | Dog and cat feces, urine | High nitrogen source, moisture contributor |
| Carbon Source | Sawdust, shredded newspaper, straw, biodegradable kitty litter (pine or paper-based) | Balances nitrogen, absorbs moisture, provides energy for microbes |
| Microbial Starter | Garden compost, septic starter | Introduces beneficial microbes to accelerate decomposition |
| Compost Bin | Plastic barrel with drainage, metal bin, Doggie Dooley | Contains waste, enables aeration and temperature control |
| Drainage Layer | Gravel, coarse sand | Prevents waterlogging, supports aerobic conditions |
Frequently Asked Questions
Can composted pet waste be used on vegetable gardens?
No. Compost derived from pet waste may still contain pathogens even after composting and curing, posing health risks. Use finished compost only on ornamental plants or lawns away from edible crops.
How long does pet waste composting take to complete?
Active composting with regular turning and temperature monitoring typically takes 6-12 weeks. Curing to stabilize compost may require an additional 6 months to 2 years depending on conditions.
Is biodegradable kitty litter necessary for pet waste composting?
Yes. Only use biodegradable kitty litter made from pine, paper, or similar compostable materials. Clay or silica-based litters do not break down and contaminate the compost.
What temperature must pet waste compost reach to kill pathogens?
The compost pile should reach and maintain at least 140°F (60°C) for several days to effectively eliminate harmful pathogens such as E. coli, roundworms, and parasites.
How often should I turn my pet waste compost pile?
Turn the compost weekly to maintain aerobic conditions, distribute moisture, and ensure even temperature throughout the pile for optimal decomposition.
—
Proper pet waste composting reduces environmental contamination and transforms waste into useful soil amendment when conducted with attention to safety, materials, and process management. Homeowners can build simple yet effective bins, maintain temperature and moisture, and cure compost for safe use on ornamental plants. Future innovations may include more efficient microbial starters and composting systems tailored for pet waste, further minimizing the ecological footprint of pet ownership.